
His and Hers wedding ring holders?! How cute and practical! Jen from Something Turquoise put together this easy (and necessary!) DIY for anyone from the DIY savvy to the occasional experimenter. This is perfect to place by your bathroom or kitchen sink and keep that precious band safe!
From Jen…
As a huge fan of Inspired By This, I’m absolutely thrilled to be here sharing this DIY tutorial with you today! Your wedding ring is the most important piece of jewelry you own, so put it on a pedestal by making yourself an adorable wedding ring holder using this simple tutorial!
Let’s get real ladies, you don’t have to be a bride or newlywed to want to make this darling project ‐ every married gal would love to have one of these fab wedding ring holders! So simple and easy to make, you’ll be done in less than an hour! Are you obsessing yet – because I am! One for him and one for you…
What You Need:
• basswood carving blocks (7″ x 3.5″ x 1.75″ )
• Sharpies in your choice of color
• possibly craft paint and brush
• Martha Stewart Crafts gloss enamel spray paint
• cup hooks (5/8 ″)
• pencil
• FREE design download from Something Turquoise

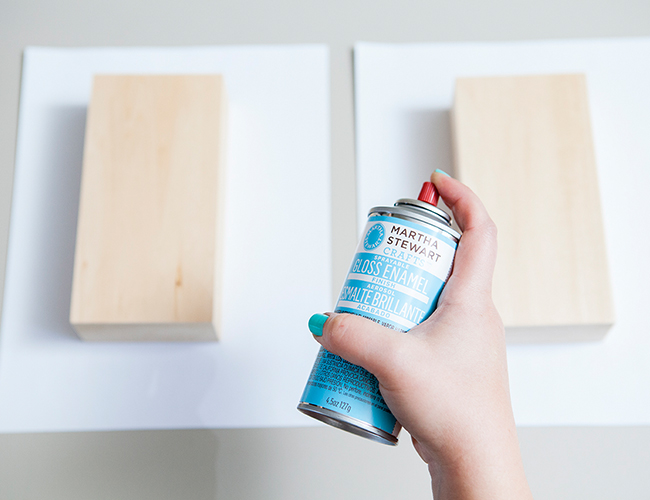
STEP 1:
The first step is to seal the wood blocks using Martha Stewart Crafts gloss enamel spray, so that when you use the Sharpies – the ink won’t bleed into the wood. This basswood is pretty porous so I did two coats. Let’s be honest – if you are going to use paint and not Sharpies, you can eliminate this step – but Sharpies are so easy!
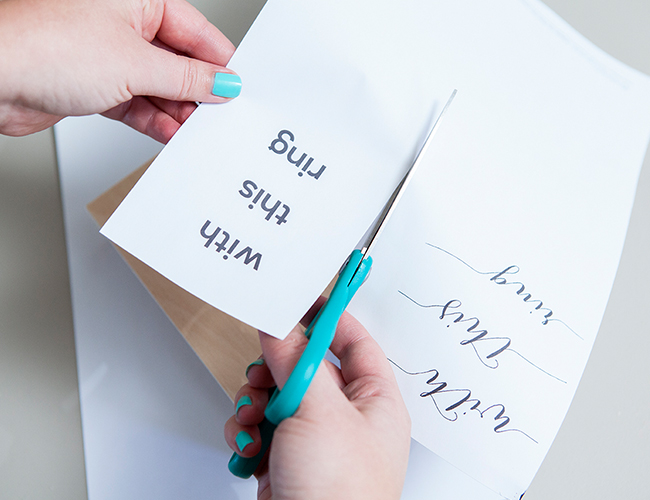
STEP 2:
Cut out our free design downloads or create your own using ANY font you would like.
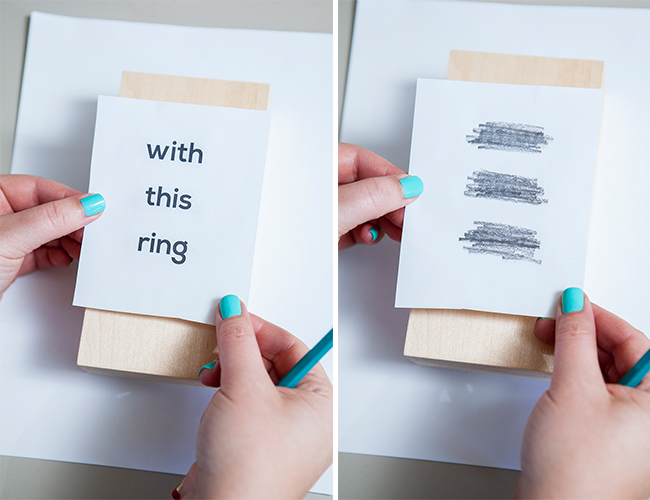
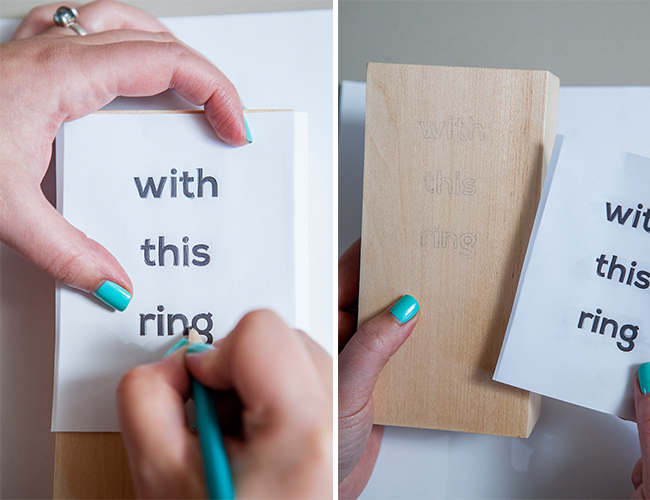
STEP 3:
This is a grade‐school transfer technique: First, shade the backside of your design with pencil‐ leaving lot’s of graphite behind then trace your design onto the wood block – leaving the perfect pencil outline to color in
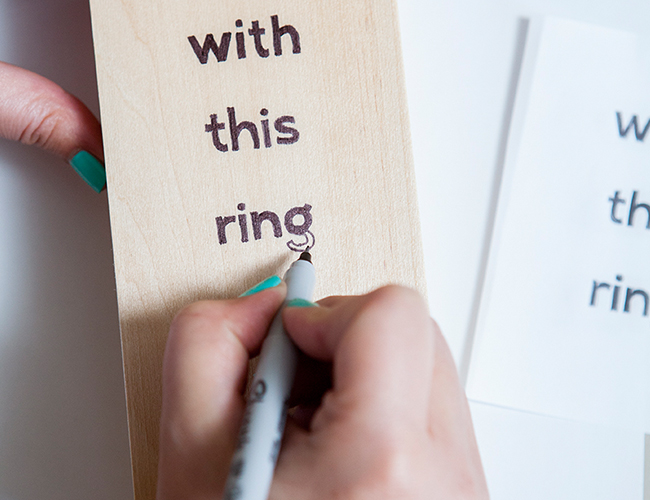
STEP 4:
Using any Sharpie, paint pen or paint and brush – fill in your design. If it’s a delicate font you’ll need to use a fine tip pen. For this design I wanted black edges and didn’t want to color them with the Sharpie (which you CAN totally do) so I painted the sides with MSC satin paint in Beetle Black.

STEP 5:
Let it dry…

For hers…
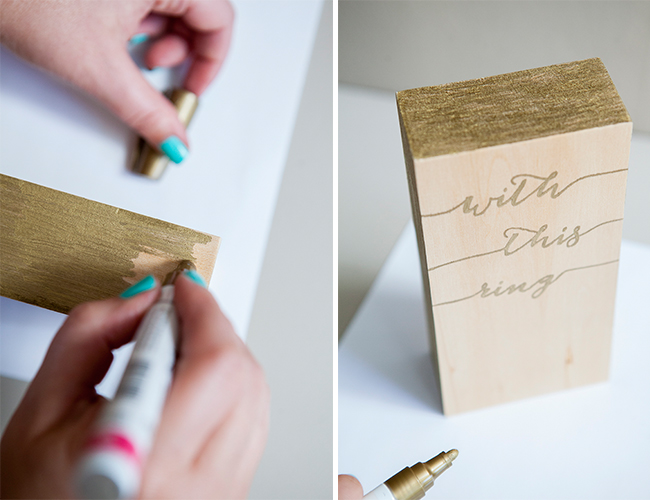
STEP 6:
Same steps as above. Shade the backside of your design with pencil then trace onto your block surface –leaving the perfect outline to color in. Easy‐peasy! Then fill in with a paint pen or real paint. Since this gold paint pen has a very distinct color (and I wanted it all to match) I colored in the sides with the paint pen instead of paint.

STEP 7:
To make adding the cup hook a breeze, make a nail hole first. Then just screw it in.
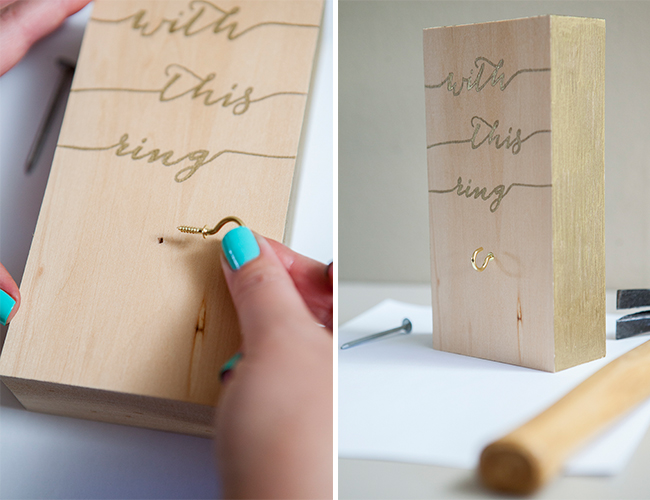
It’s done – and it’s fabulous.
**Optional step: to further seal your design – apply another 2 coats of the gloss enamel spray.
All that’s left is to hang your wedding rings!
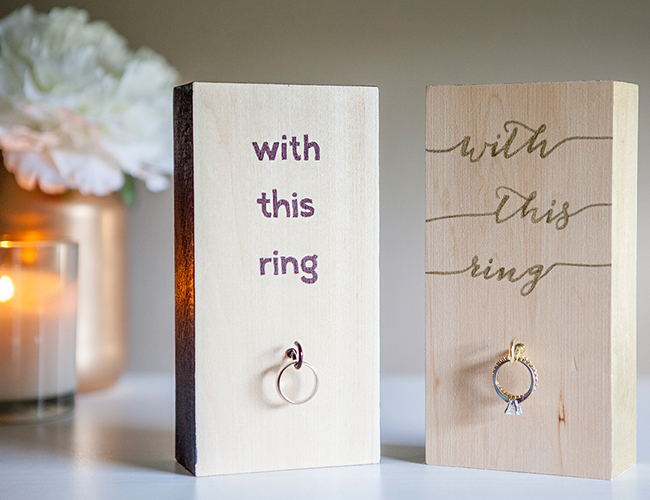
CRAFTERS TIP: Very Important: If you have a wide ring width‐ you might need a larger cup hook then we have here! When purchasing your cup hooks make sure that you are happy with how your ring hangs from it.
DIY Tutorial Credits:
Photography: Studio 11 Photography
DIY tutorial + free download by: Jen | Something Turquoise
Basswood carving block (7″ x 3.5″ x 1.75 ″), Sharpies, Martha Stewart Crafts paint in Beetle Black and Gloss Enamel spray: Michaels
Cup hooks: Lowe’s
Nail Polish: China Glaze – Too Yacht to Handle
So cute! I might even use this idea just to hold any of my jewelry
So clever!
I love this! If i get married one day I am definitely doing this cute ring holder!
I love this ring holder! I will definitely do it!
anything painted gold, and I’m in!
so genius!!!
Agreed!
That’s usually our motto 😉
would love to see a pic if you make one!
Awesome! Makes for a great gift too at bridal showers, etc!
We thought so too!
Totally! Could use any quote 🙂
So easy! You could make it with any quote, and hang other jewelry on it as well!
Yep! Love that, let us know if you give it a try!
Amazing idea!!
Does anyone know the names of these fonts or if/where I could download them?
This DIY ring holder is a great idea. Will definitely consider this in my wedding plan.