We’ve got a super fun and easy DIY for you on the style blog today! Anyone who knows us knows that we’re way too excited for Fall to arrive and to break out our boots and scarves. So today, we’re going to make our own! One of our favorite DIY bloggers, Stephanie from Make and Tell, created this one of a kind fashion accessory that we know you’re going to love as much as we do!
From Stephanie of Make and Tell:
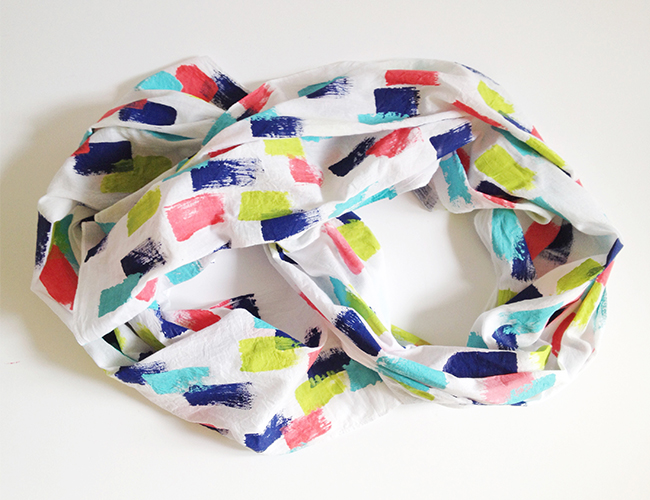
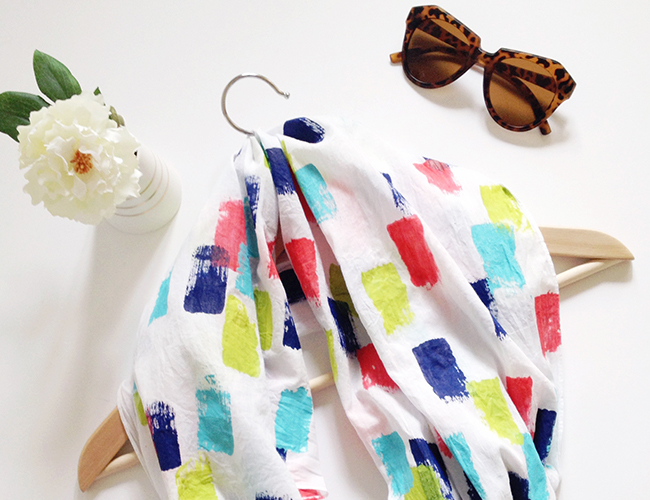
A girl can never have too many scarves right? I hope that’s true anyway otherwise me and my growing collection might be in some trouble! I just can’t help myself – I love how scarves can instantly brighten up an outfit and I’m addicted to all the gorgeous prints and patterns out there.
If you’re like me and you love a good scarf but you don’t have a lot of cash up your sleeve, don’t despair – what you can’t buy, you can DIY! It’s super easy to make your own bright and colourful patterned scarf with minimal effort and cost. If you’d like to see how, follow along below!
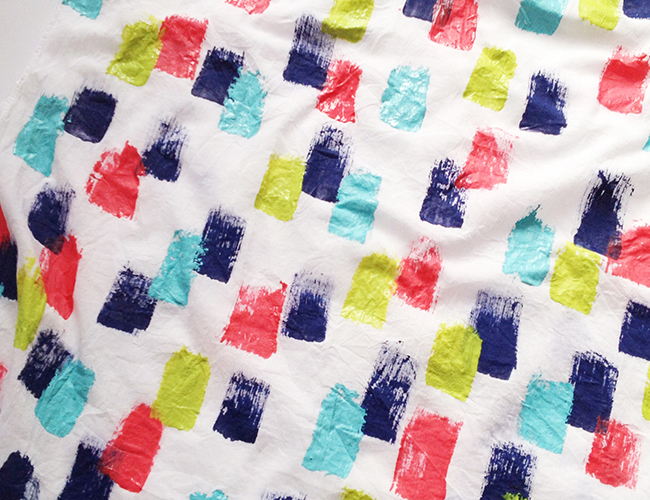
In case you’re curious, the inspiration for this project came from the beautiful brush stroke patterns I’ve been seeing online lately. They’re so simple to DIY and very versatile – you can easily change up this project and make a scarf with a completely different look just by varying the brush strokes you use (if you need inspiration, see this beauty by Kate Spade).

MATERIALS
White/blank light cotton scarf
Fabric paint (in any color you like – the more colors the better!)
A wide, flat paintbrush
An iron (if your paint requires heat setting)

STEP 1
Give your scarf a good wash (without fabric softener) and iron it before you start painting. Usually, I’m too impatient to bother with much prep, but this is important as it’ll get rid of excess chemicals in your cloth and will help your paint to stick properly.
STEP 2
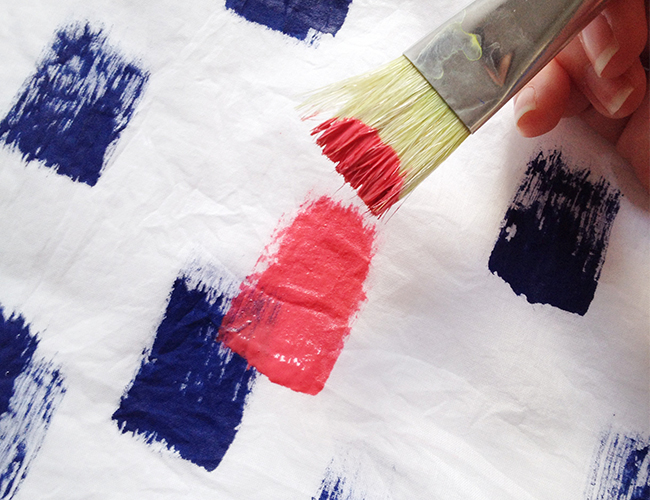
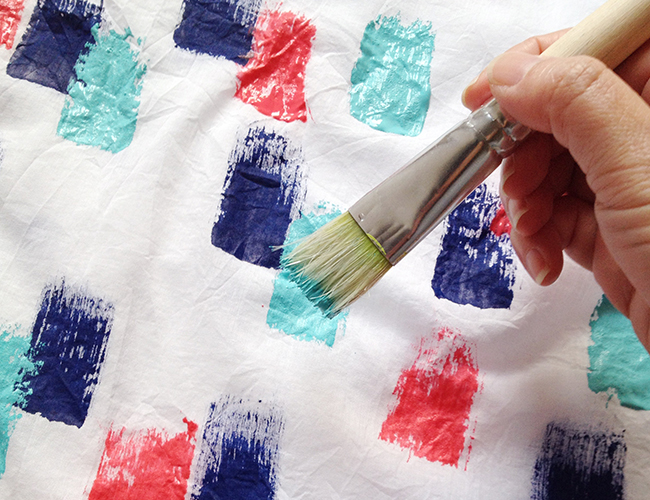
Place sheets of plastic underneath your scarf to protect your work surface from any paint that might seep through. Then get painting! Using a wide, flat paintbrush start brushing short strokes of paint over the length of the scarf, all going in the same direction. Try not to overload your brush with paint, otherwise you’ll end up with spots and blobs rather than the brush strokes we’re after.
There’s no right or wrong way to do this, so feel free to experiment while painting to find a method that suits you best. I went with painting each colour separately, starting with the darker colours first and then overlapping those with my lighter/brighter colours. This meant that the brighter colours would be on top and more obvious. It also meant I could do all of one colour before washing my brush and starting on the next (because I only have one brush in this size!). If you’re making a lot or have to step away for a bit from your project, we love these paint brush covers to keep your brushes fresh! They’ll keep the paint wet and the brush will be ready for you right when you get back without getting paint everywhere!
STEP 3
Leave your scarf lying nice and flat to dry (this may take up to 24 hours) and if your paint requires it, iron your scarf on the reverse side to heat set your pattern. Make sure you follow the manufacturer’s instructions when you do this to ensure your paint is set properly.
And there go, you have a new scarf to add to your collection without breaking the bank!