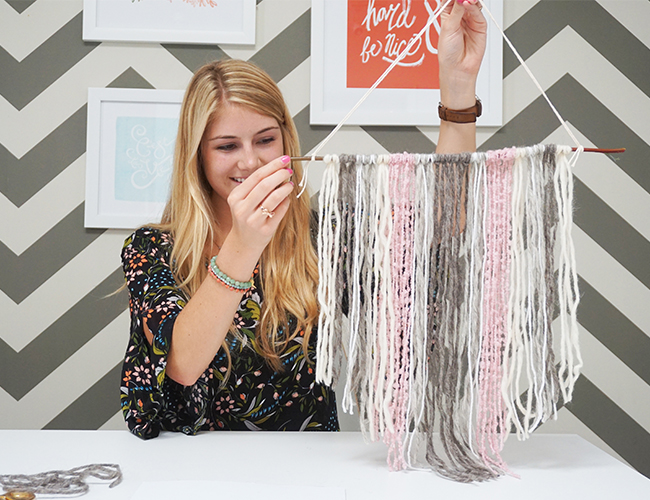
We’ve been seeing these fun hanging tapestries everywhere … and with plenty of yarn on our hands, thought to ourselves “why not create our own?”. Mission accomplished. This pretty DIY tapestry came out just as we imagined .. and we found the perfect spot for it in Leila’s daughter’s room! It’s ideal for a nursery or office! We made it in shades of pink, cream, and gray, but you can apply the same technique to any type of yarn and color. What else do you need in your nursery? This mobile.
What You Need:
Yarn
A Dowel or Stick – about 16 inches long
String or Ribbon

Instructions:
1. Pick the color pattern you want your tapestry to hang in. We progressively used lighter colors as we moved from the center out and book-ended our pattern with the same color used in the middle.
2. To start, cut the strands of yarn the same length, start with approximately two feet to be safe.
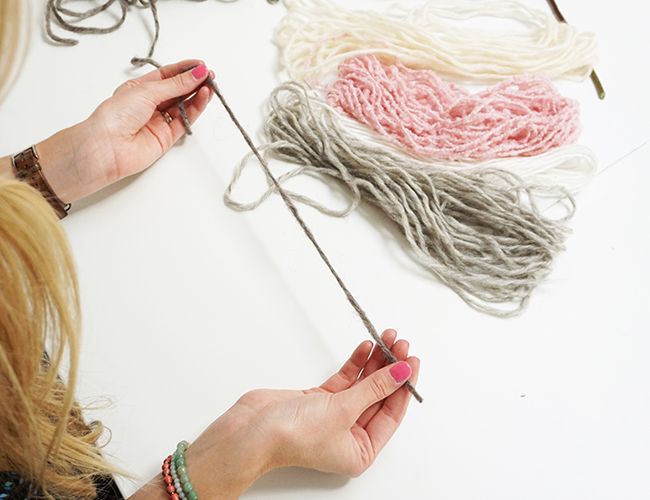
3. Begin in the middle, and loop the strands around the stick. We looped five strands in the middle section but you can make each section however thick you would like. To make the sections fuller, use two strands for every loop.


4. Continue looping the strands until your pattern is complete and you have about 5 in. of stick on either side.
5. Tie your string or ribbon to each side to make a hangar for the tapestry.

6. Trim the hanging strands in a chevron shape, getting shorter as you move out from the center.
7. Hang and admire!