
We feel strongly about our braids and our top-knots over here, so it’s no surprise we’re loving this DIY braided bun on our style blog today! 10.11 Makeup always hooks us up with the easiest (and chicest) hair-dos to try out. She is single-handedly responsible for the versatility of our day-to-day hair! This everyday do will help you leave the house in seconds (when it looks like it took much longer!).
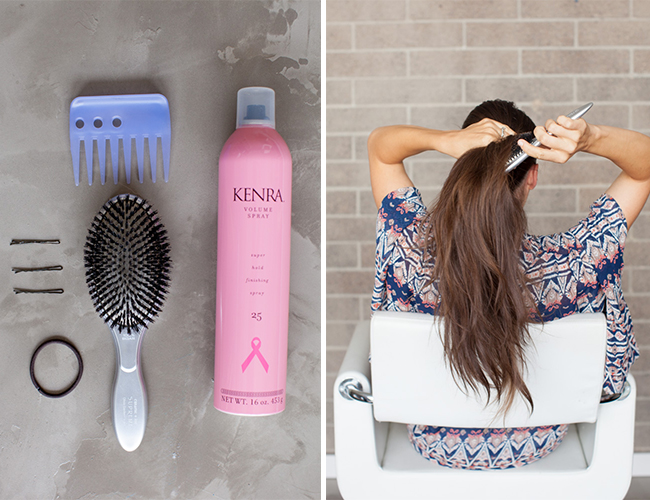
Directions:
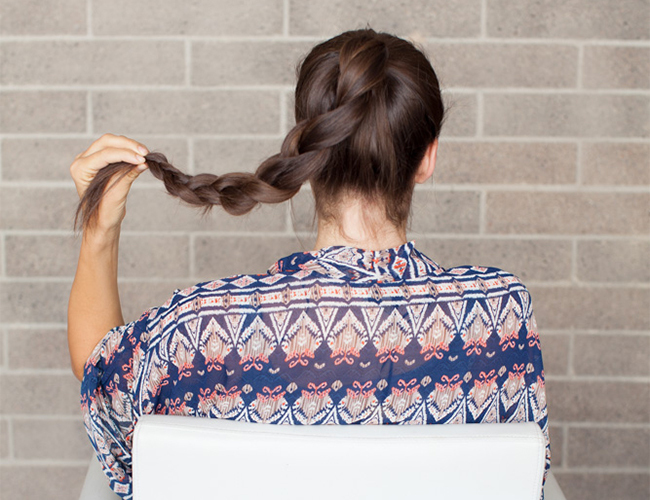
Step 1: Gather your hair into a pony tail and secure with a hair tie. Keep in mind that the base of the pony tail will be the center of your bun. The higher the placement of the ponytail, the higher the bun.
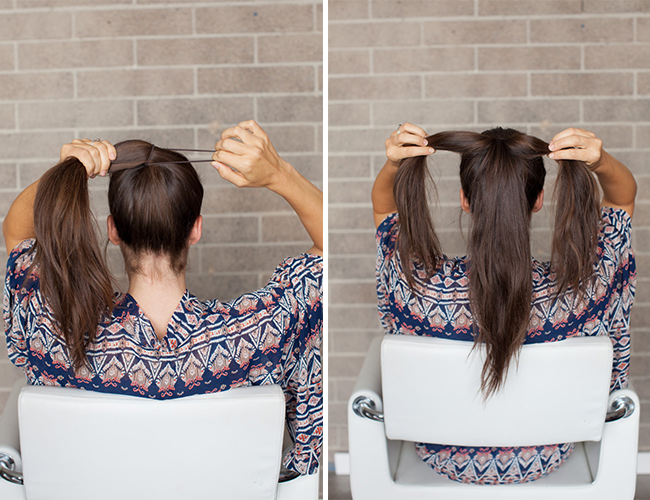
Step 2: Separate the ponytail into three parts, and braid the ponytail into a three strand braid. * you have the option to do any type of braid that you wish, allowing this style to be versatile.
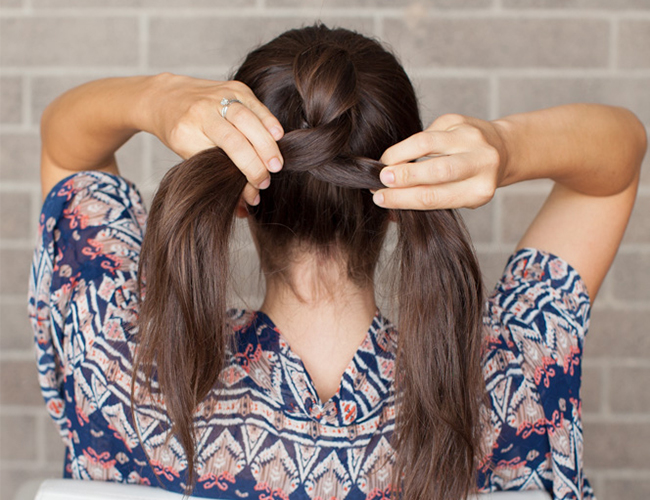
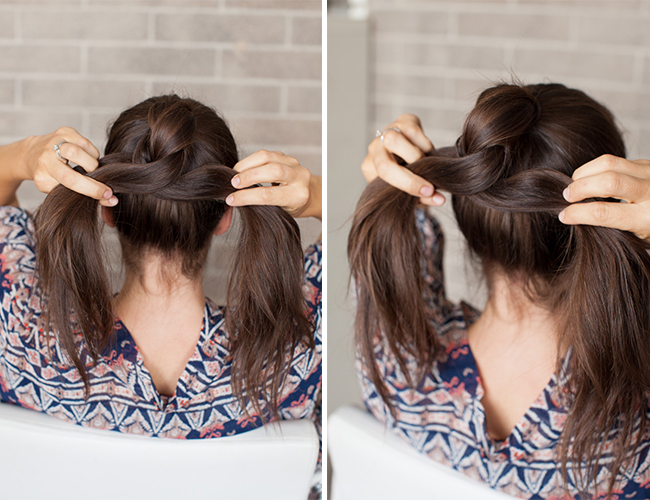
Step 3: Take the ends of the braided hair and wrap it around the base of the pony tail, forming a bun. Try and keep the hair horizontal as you wrap, allowing the detail of your braid to show more.
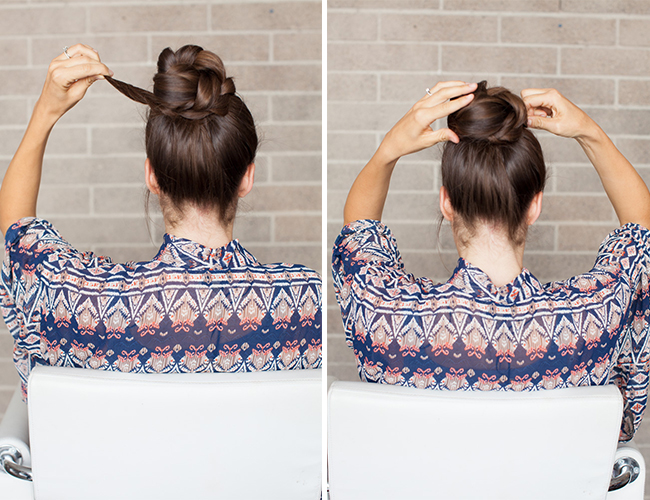
Step 4: Secure the end with a bobby pin as well as the perimeter of the bun, and spray with a finishing spray. * make sure to keep your pins hidden.

This is going to be my new go to hairstyle!
I can’t wait to rock this every day!
love it!
Makes the bun so much fuller!
YAY!
it’s going to be the “new” topknot!
we do too!
right?! adds a little glam to the look!
This is a great idea for taking a hairstyle from day to night by just wrapping the braid! Thank you!
This looks so easy!! Definitely trying this out this week!
What a cute hairstyle!